Review : Blackstar St. James EL34

Blackstar St. James 50/EL34 in Fawn
Before I get too far into this review, a huge shout out to The Arts Music Store in Newmarket Ontario for making this review possible. If you don’t shop there, you should. Here’s a link to the amp at their site.
Hey folks. This time I am taking a dive into the new St. James amplifiers from Blackstar. I am specifically using the EL34 combo version, but do be aware that there is also a 6L6 version as well as both available as separate heads and cabinets.
Blackstar claims that this is the lightest 50 watt all valve amp in the world. For those not into British terminology, valve means tube. I will say that carrying the amp out to the car and then up the stairs once to my review location was a piece of cake. It weighs a light 12.8 kilograms for the 1x12 combo that I am using. For those of us accustomed to humping any other 50 watt valve combo, this is an amazing thing. Part of that weight reduction is the cabinet and part of it is the speaker itself. The speaker is a Celestion G12-Z-70 Zephyr. It’s not giving up anything for weight when running.
About the Amplifier
The amplifier is designed with a reactive load circuit so you can run it at either 50 watts or 2 watts. These are tube watts if that makes sense so the 50 watt option is capable of loud volumes, absolutely capable enough for a club gig if it’s your only sound reinforcement. For practicing at home or when you don’t need all the output, the 2 watt setting is perfect. You can get the preamp tube working hard without blowing out your eardrums or inviting the local police to tell you to turn it down. In this build, the preamp tubes are a pair of ECC83s and the power amp tubes are a pair of EL34s. There is a middle position called Sag, which does what you expect. Not really my thing, so I did not spend a lot of time there.
There is a 2x12 combo version available as well as the separate head and cabinet, where your cabinet choices are 1x12, 2x12 and 4x12. Lots of options. I chose the 1x12 combo for this review because a) it was available and b) I really wanted to see how this small but powerful combo would compare to other similar powered and speakered combos.
The amplifier has two separate channels. Channel One, for all intents the clean channel has a very American tonality to it, along the lines of a Deluxe Reverb kind of. Channel Two is gain staged so you get a more British tonality and depending on the cabinet chosen, you can go jangly or crunchy. Channel Two also has a selectable clean boost which pushes the amp into overdrive sooner. There are no controls on the boost other than on or off so it’s not a tool that I would use much but I see the benefit for those who do. Personally I found a really pleasant overdrive with the Gain at about 1. After that it got a bit too muddy for my taste, but we all desire different things. Both channels are controlled by a Master volume and they share a three way tone stack and a reverb. The documentation does not specify so my gut check is that this is digital reverb because I cannot find a spring tank. It’s a nice reverb with good range and doesn’t get swampy offensive. The amplifier includes a footswitch for channel selection but my evaluation unit did not have one with it (they offered, but I wanted to keep things simple - so my choice).
Please note that most of the play testing was done at the 2 watt setting excepting wanting to find out how loud the 50 watt setting is.
What also appeals to me is that the amplifier has a DI out. There is a USB B connection to connect to your computer. I was working on a Windows machine and even with an indepedent ASIO driver, I could not get any sound into the DAW in this scenario, Presonus Studio One. The USB connection works because I was able to use it with Blackstar’s Architect software to run the amplifier’s embedded Cab Rig software. More to come on that later. Since I couldn’t get a sound out of the ASIO connection, I plugged an XLR cable from the output on the amp to an input on my UA Apollo Thunderbolt Solo and after changing the audio interface in Studio One back to the Solo, got audio right away. I don’t use Windows for recording very often, so the fault is likely my own, but I do feel like I am doing a random death roll of the dice every time that I have to play with ASIO. The Solo just works.
When I was installing the Architect software, it found the St. James without any issue and notified me of a firmware update. I clicked OK for the update and it was completely transparent and flawless. There added a level out control that I think is beneficial.
As there is also a headphone out jack, you can go silent if you wish. The Master volume control also controls the output level of the DI out. For silent recording, just leave the amp in standby mode. This also activates the reactive load functionality for recording purposes when you are using the Cab Rig switch on the panel. This allows you to choose between the three default options. The first is a balanced pair of 4x12s one being a modern UK 4x12 and the other being a vintage UK 4x12. The virtual microphone on cabinet one is a 421 dynamic and on cabinet two is a 57 dynamic. The room setting is small stereo. The second consists of cabinet one being an open backed US 1x12 with a U67 condenser and cabinet two is a UK 2x12 with a closed back and a 121 ribbon in a large wide room. The third consists of cabinet one being a 4x12 classic UK with a 414 condenser microphone and cabinet two being a 4x12 modern UK ceramic with a 421 dynamic microphone in a small damped room. If you run Cab Rig inside Architect, there are controls available for tone as well as high and low cut. Cab Rig also provides 15 other cabinet microphone options. More on Cab Rig later.
When you power the amp up, and the tubes are ready, the Blackstar logo on the front lights up. It stays lit so long as the amp is powered, even when the amp is in standby. If I could have a different colour for standby that would be cool I think. The control panel is very cleanly laid out.

50/EL34 Main Controls
I would say that the jack panel is well laid out as well, but its location puzzles me completely. It’s on the back as I would expect but it faces downwards and you have to be able to either flip the amp onto its face or be content trying to feel your way around to plug things in. I am sure that this was done for a reason, but I cannot determine what that reason might be and to be candid, find the placement rather goofy. I could see the argument that in this build, nothing sticks out the back that could then be sheared off in an accident, but it does mean that jack access is awkward.

St. James 50/EL34 back view. Note that the jacks are all under that lip. Nothing to get sheared off, but awkward to get to
Overall fit and finish of the combo is excellent. No loose cover corners and the materials do not feel cheap at all. As a plug and go live amp, it’s very impressive.
Playing and Recording
As I noted at the beginning, I wanted to look at this amp specifically to determine if I thought it was a fit for practice and gigging to a club level. I had asked the folks at The Arts if any of them had played the series and Dylan advised that he had, and for his styles that he plays, he preferred the EL34 version. He was very positive about the amp, but admitted he wasn’t sure if it was a good pedal platform. Since I am a confirmed pedal geek, I have added it to the list of things to try. I am very pleased to see that it does have a send/return effects loop as I will put delays, modulations and reverbs there for preference if available. I just like them there more than in the front. Personal opinion. So we will find out how that plays with this amplifier.
Of course as a recordist, I want to know how the amp records as well, and I particularly want to use this Cab Rig functionality to determine if it provides a good general fit. So that comes in as well.
Time to get to work.
This first sound file is just a G chord played in three different settings on the amp. The first section is the clean channel, the second is channel 2 and the third is channel 2 with the built in boost engaged. It gives a general sense of what the channel options do, nothing more than that.
This was recorded by using the XLR out on the amp to the input on the Apollo Solo. Studio One (Windows) is the DAW and no effects or post processing were applied, this is the raw tone. Because I went DI to the DAW, I used the Cab Rig function in the amp, and set the cabinet to be a 1 x 12 American Classic Alnico, miked with an emulation of the Neumann U67 condenser microphone. The EQ in Cab Rig was bypassed.
This next short piece is just a 1-4-5 progression recorded using the same methods as above to give a slightly dirty sixties rock feel. A Roland Space Echo was added after EQing to create a bit more space.
I’m using the same guitar for all of these, a Paul Reed Smith CE 24, with the pickup selector in the centre position and no coil tap engaged.
This next short clip is sort of a bluesy-rock generic thing that isn’t special but is used to illustrate the flexibility of the second channel with the clean boost into a pair of 4x12 cabinets. These are Cab Rig cabinets of course. Both cabinets are Vintage UK 4x12s. The mike on cabinet one is a Shure SM57 and the mike on cabinet two is a Royer 121 and is based on the Cab Rig preset called Jangly 4x12.
While I have a lot of cabinet and amp emulations already available to me through my Two Notes subscription, I would say that the buyer of a St. James not only gets a really nice and functional lightweight and portable amp, with buckets of power on tap, that buyer also gets a very flexible recording capability. While I did not get the ASIO connection working, I don’t care because I always either run a DI out, or mike up the cabinet. Having that XLR out on the St. James is a win, and I would propose that you are getting really decent cabinet simulations and reactive load capability all in one place.
A Deeper Look at Cab Rig
I am very impressed by the St. James even as just an all tube amplifier with two power levels. What makes it special is the reactive load and cab rig capability. As noted early on, if you don’t use the Architect software and Cab Rig, you still have three default cabinet sims on the amp, albeit placed on the awkwardly placed jack panel.
First go to the Blackstar website and register your amp. Then from Support | Downloads, download the Architect application. Also download the manual because while the app is simple, it needs to be manually placed in a specific place to update automatically. To use Architect and Cab Rig, you connect the USB B port on the amp to your computer. Note that the USB cable is not included, so I would recommend heading over to Amazon and ordering the longest USB2 A to B cable that you can find. Once connected, power the amp up and once the Blackstar logo is lit, then launch Architect. If you have connected the USB properly, Architect will find your amplifier. It will check for updates on start and prompt you to update Architect or your amp firmware if either is needed.
What you see in Architect will be dependent upon the device that the computer is connected to. In the case of the St. James you see Cab Rig. Blackstar DSP based amps have different options, but this is a simple tube amp.

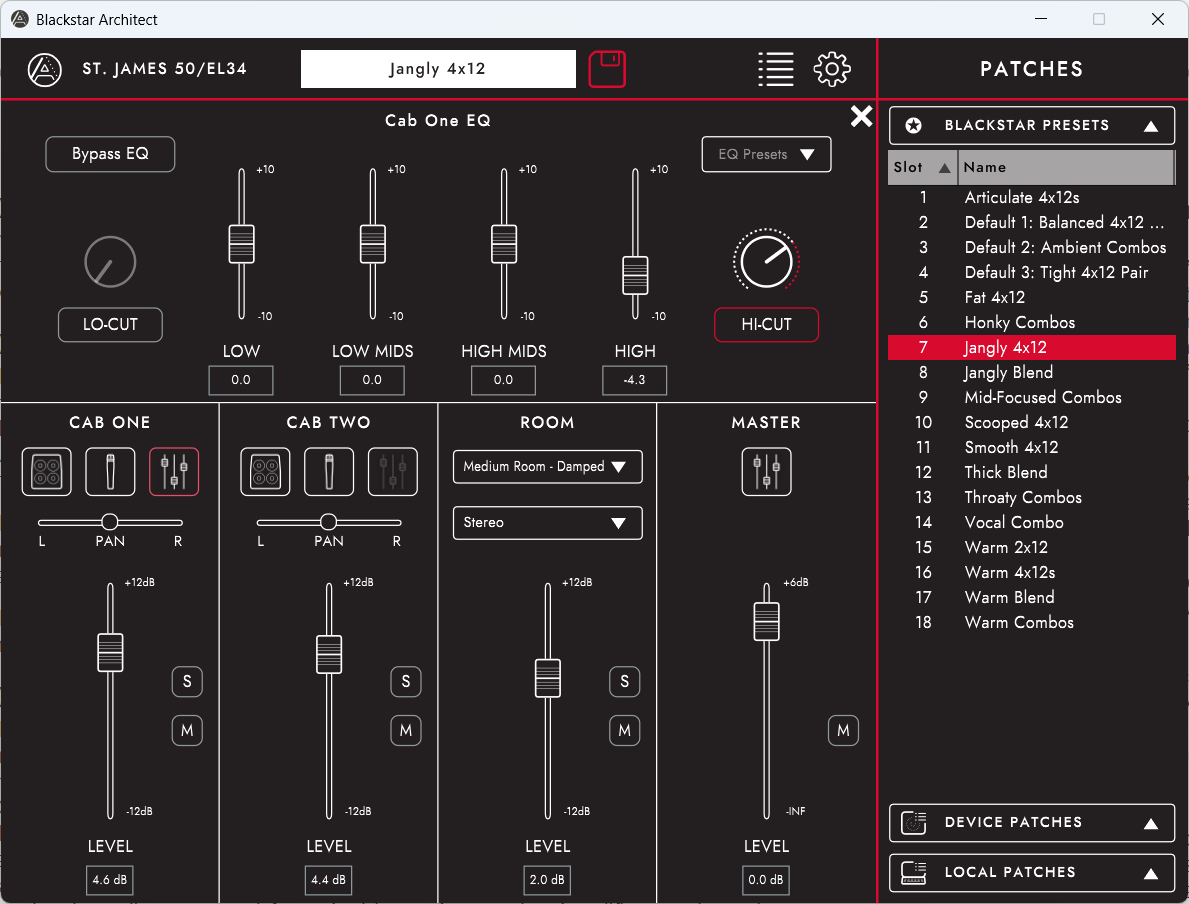
Cab Rig Expanded View
This is the Cab Rig expanded view. You can see the presets panel by clicking the menu icon as I have. The software comes with a number of built presets that are a good place to start in my opinion, although I never used any of them without some modifications. In the example above, I have chosen the Jangly 4x12 preset and we can see that it has two angled front 4x12 cabinets set to the same level in a medium sized damped room with stereo capture. Cab One has a microphone on axis and Cab Two has a microphone off axis based on the graphic. You can solo or mute each cabinet or the room effect if you wish and while each cabinet and the master have individual EQ settings that you can alter, you can also defeat the EQ entirely for each if you wish. There is space on the amplifier itself to store device patches, and you can save your own patches to the computer and use them live so long as Architect is connected to the amplifier. The amplifier has three patch slots and comes with them populated but you can click the save icon (looks like a diskette) and choose to save to device. You will get a window like the one below to choose which currently saved preset you will replace on the device. This is handy for live gigging because you can have three distinct cabinets loaded in the amp, and feed the line out with whichever one you want to send to the PA or house mixer. Remember of course that these presets have NO impact on the speaker in your real cabinet.

Saving a patch to the amplifier directly
In addition to the Blackstar Presets, the device patches and the local patches, there appears to be a Community for sharing patches, but as I could not locate any documentation for Cab Rig, I could not figure this out.
This next image shows your choices of cabinets available in the Cab Rig software. You get here by clicking the cabinet icon on the main page. There’s no detail beyond the description. Try different cabinets until you find your preference. As each patch allows for two cabinets, you can mix and match cabinets as you like. The currently selected cabinet is indicated in red.

Cab Rig cabinet selector
Just as Cab Rig lets you choose a cabinet, you can choose a microphone for each cabinet by clicking the microphone icon on the main page. A number of different microphone emulations are provided. No manufacturer names are used but as you will have noticed, I assigned a brand in my earlier descriptions to give you a better sense of which microphone is being emulated. While I do not know for sure, these may be simple tonal maps, or could have been created by some sophisticated manner. This is not dissimilar from any other software that simulates a microphone as best as I can tell. The microphone selected is indicated in red and if you click the AXIS button you can change the microphone from off axis to on axis. There are no positioning controls for the microphones other than this simple option.
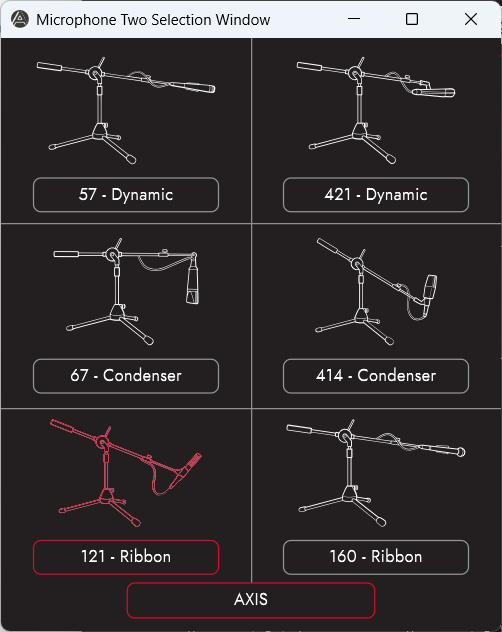
Cab Rig microphone selector
In this next image, you can see the potential EQ options. We know that we are looking at the EQ settings for Cab One, because it’s EQ icon is coloured red. We can also see that the Hi-Cut filter is active because it’s name is outlined in red. You will note the EQ Presets dropdown that offers a variety of presets for EQ for that cabinet if you are so inclined, or you can set it all yourself. On the upper left is a button marked Bypass EQ which allows you to defeat the EQ for the cabinet entirely.
Cab Rig EQ options
As A Pedal Platform
Blackstar says that the St. James is an excellent pedal platform. Really, would you expect them to say otherwise? In my opinion, that descriptor is quite vague because experience has taught me that while some amps are great with some pedals, they are less than optimal with other pedals. Consequently, whether the St. James is a great pedal platform will depend to a great extent on the types of pedals that you might use with it.
As it has a decent crunchy tone, and can be pushed into overdrive by manipulating the volume and gain, which is great, you may just want to punch in an overdrive or even a distortion pedal. So I pulled out my D&M Drive, the double function pedal designed by Robert Keeley in conjunction with Dan and Mick from That Pedal Show. I put it between the guitar and the input, so in front of the preamp.
Another pedal I would be inclined to use personally is a compressor. I have an MXR M76 Studio compressor pedal that purports to be like a UA 1176 rack compressor. I think that this is a stretch, but it’s not one of those squishy compressors and I like how it works with single coils. I put in in front of the D&M drive.
I’m not flush with fuzz pedals or heavy distortion pedals because mostly I don’t use them, so cannot offer insight in that regard, although my opinion is that by the time you get to something like this, the amp’s voice is pretty much buried in the fuzz.
While some folks prefer to put all their pedals in front of the preamp, often because the amps that they use have no other option, if there is an effects loop, I like to put modulations, delays and reverbs between the preamp and the power amp sections, which is what an effects loop is designed to do. I had a Wampler Terraform and a TC Hall of Fame 2 on the shelf and so tried them. They are both fine pedals, although I find the writing on the Wampler very small and hard to read, and I tend to go with non-digital reverbs or use a plugin that emulates an EMT-140 plate reverb, for no other reason than I really like the sound of a plate. For delay, I used an Eventide Time Factor unit. It has great sounds, but Eventide user interfaces give me a headache so it doesn’t get used in production setups. That company has since produced a much simpler to use pair of delays, the Ultra Tap and the Rose, which consume functions from the H9 Max, but the sounds are more complex than I would use. Give me an old Echoplex or Space Echo, or one of the new Wampler Metaverse delays, but as I have none of those, I used the Time Factor. I put them all into the effects loop. I used a CALINE power supply for each pedal other than the Eventide because they are rather picky and demanding. Every pedal from the CALINE got 9V at 100mA except the Terraform which got 18v at 100mA which it prefers. The CALINE provides isolated power to each pedal so even with everything plugged in and turned on it was still wonderfully quiet with absolutely NO noise added at all. Brilliant!
This gave me, what I would consider to be a well represented pedal board that is still portable for gigging. For my testing of this, I worked almost entirely in gigging mode, which means no computer, no Cab Rig, no DI just the guitar, the pedals and the amp all coming out of the Celestion Zephyr 12” speaker. So let’s look at what I found from a pedal usability for each pedal. The pedals are described in their order of routing.
MXR M76 Compressor

With the compression set to 4:1, a reasonably quick attack and a longer release and the input gain up to maximize the circuit and the output down for neutral volume when the compressor was in or out, I got better results than expected. There was no noise, no pumping and the increased sustain and effective compression algorithm smoothed out the lines and chords as needed without sounding like it was getting hit by a compressor. As it should be. So I rate the St. James as being excellent with a non-squishy compressor. I do not own any squishy compressors (don’t like ‘em) so I have no opinion on those.
Keeley D&M Drive

This is a wonderful gain staging pedal. The Mick side is a clean boost and the Dan side is an overdrive that can be pushed into distortion. My experience is that this pedal works nicer to my ears with an EL34 type power section over a 6L6 type. That is of course, my opinion. I set the Mick side to clean boost with the tone at 3 o’clock and neutral gain. This takes the inbound signal and opens it up a bit without losing any of the bottom end. Gain is at noon. I set the D&M to put the Boost side first, a really nice feature in that pedal. I look at clean boosts as nearly always on functions for that openness that I get. The St. James performs admirably with a clean boost.
The Dan side was set for neutral volume with the Gain at 3 o’clock. I have found this side at noon to be too dark, so I set the tone knob at 3 o’clock and got some really nice heavy overdrive and even decent distortion depending on how hard I was hitting the strings. I like the native channels in the St. James, and would use Channel 2 in the amp for light OD, and the Dan side for heavy OD or distortion. With humbuckers the boost for Channel 2 on the amp gets a bit muddy to my ears, so this pedal combination is I think a great choice. I say that the St. James works wonderfully with heavy OD and distortion pedals.
Eventide Time Factor
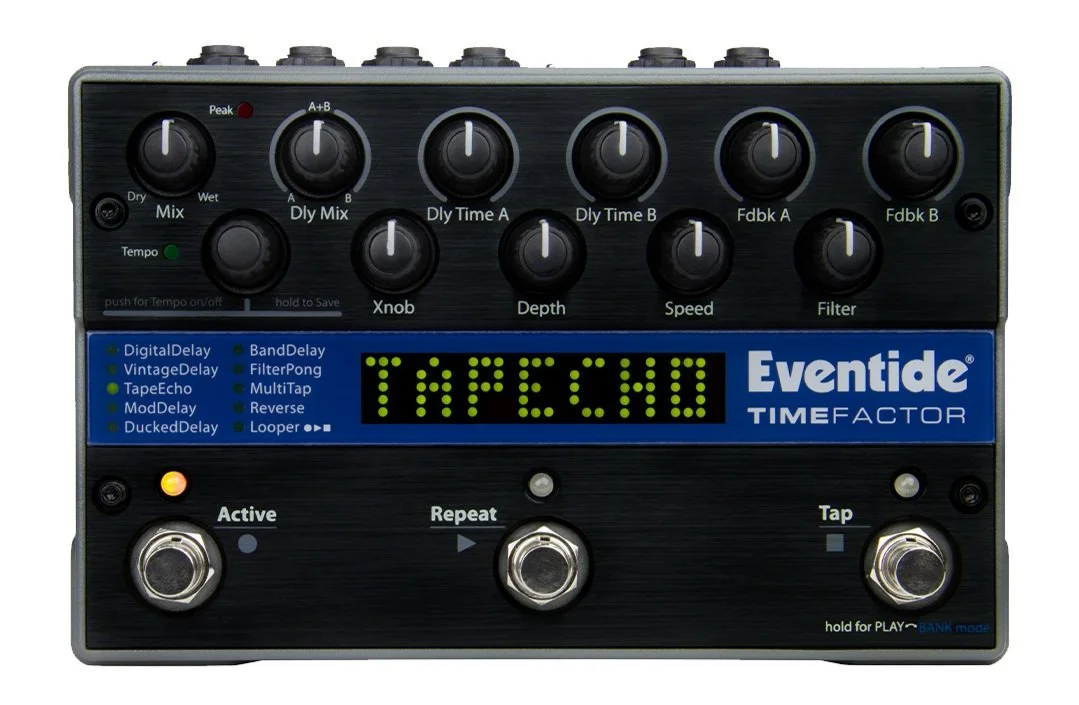
This pedal was the first in the chain in the effects loop. There is no simple level control on the effects loop, so I did not run any of those pedals in kill dry mode. After a bit of struggling to remember the interface, I got it set up for a two head tape echo with nominal saturation, wow and flutter. Tape is my favoured delay type as you may have gathered and while the Time Factor is massive overkill for something this simple, it’s a sound that I like. No noise, no artefacts and the mix control really works well with the amplifier to give you the blend you want. The St. James sounds great with a delay in the effects loop.
Wampler Terraform
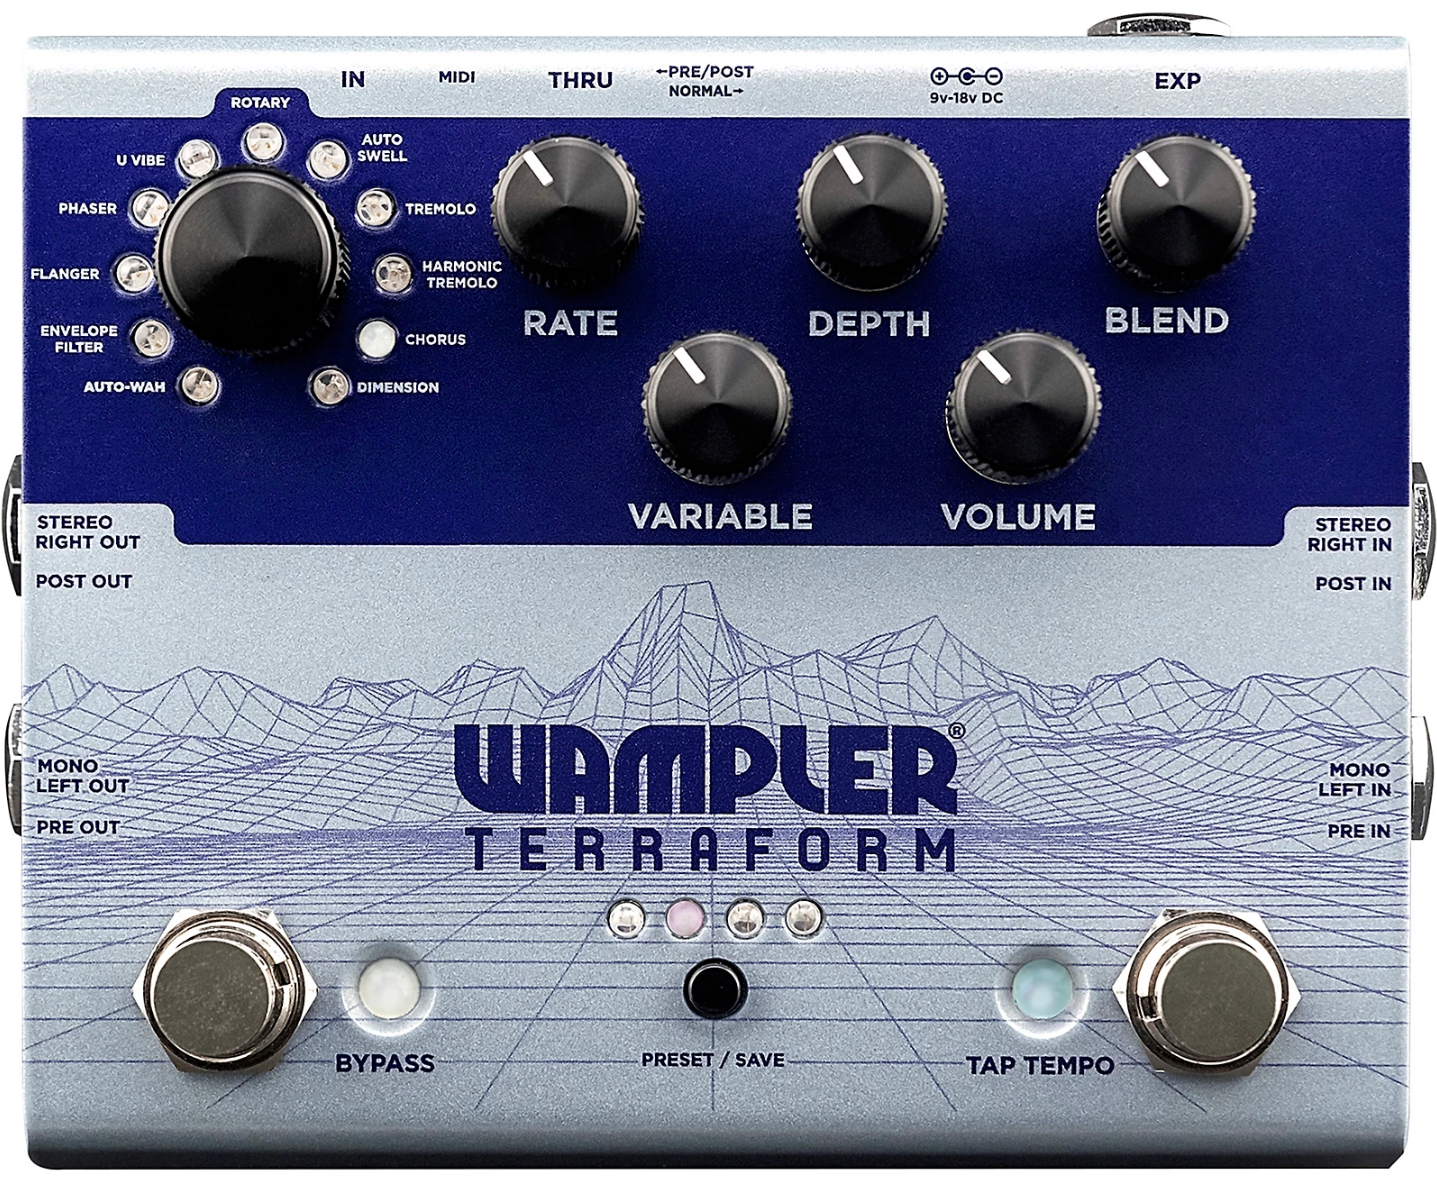
This is such a nice pedal, I really wish I could read the printing on it. I’m not much for wild modulation effects myself, but I love the space that I get from a slow rotary speaker and the Terraform does a really nice rotary, so because that is a CPU heavy effect and rotary emulations often turn to muck quickly, I was very pleased to get a lovely smooth slow wide rotary in the St. James effects loop. I tried the other usual suspects such as phaser, flanger, swell and they all sounded fine, just not stuff that I use much with the exception of a very light flange, again for space and depth.
TC Electronic Hall of Fame 2

I have mentioned that I like the reverb in the amplifier and I set it so it is just there as coached by Daniel Steinhardt of That Pedal Show, Very general playing this is all that I need. However, I also said that my favourite reverb is a plate reverb and the Hall of Fame does a decent if not spectacular plate. Once I found a pleasing Decay and PreDecay, it was just a case of finding the right balance of dry and wet and when I did, the sound of the plate is very pleasing, so no concerns at all with using a reverb pedal with the St. James
Obviously, once I completed the individual checks, I played with multiple effects punched in and found the experience very pleasing. I was able to get a sense of more space and depth out of the single 12” speaker cabinet as well as vary the level of overdrive and increase sustain as I like.
Finally in order to give you folks a sense of what I was hearing from the amplifier, I ran an XLR out of the St. James to an interface on the Apollo Solo and recorded a short passage into the computer. I did use the Cab Rig for this to a pair of 1x12 cabinets, one miked with a ribbon and the other miked with a dynamic. I left all the EQ settings at noon, and post recording used an Izotope EQ and Compressor set very light with the mix of effected low compared to dry from their excellent Neutron mixing plugin. I did no mastering or other work.
The guitar was my Stratocaster, volume and tone all up, switch in the middle. I used the Compressor, the Mick side of the D&M Drive to the amp and the Eventide set for Tape Echo, the Terraform set for slow rotary, and the Hall of Fame 2 set to plate in the effects loop. So what effects you hear are all from the pedal board. Consequently, I would say that the St. James is a superb pedal platform for gigging and direct recording.
My Conclusions
I was very pleased that even with my US Strat Ultra there was NO noise at all whether I went direct to the amplifier or through the pedalboard. Unlike the older Fender Vintage Noiseless (aka Vintage Toneless) the pickups in the Ultra are really very pleasant and that guitar worked great with the amp. I actually preferred the sound of the Strat over the PRS in this amplifier for whatever that is worth.
Okay, I am impressed. While I have found less expensive all tube amps out there, albeit at lower power output and not all with the output options, when you roll in Reactive Load, DI output and the Cab Rig cabinet emulation software, it’s my opinion that this is going to be pretty tough to beat for the investment. Now consider the minimal weight and easy transportability and you find another bonus item. With a MAP set at $1699, this is only $100 more than just the head, so in my opinion, it is absolutely worth the extra $100 to get this really nice little combo. It has multiple speaker out connections, so you can add cabinets if you wish. Convenience counts in my book. It is an ideal small amp for practice at home, for recording and for gigging all in one light package. I strongly recommend you taking a look.
Please consider subscribing to the articles and to the podcast. Thank you for reading and until next time, peace.